The Parking Brake is a manual, mechanical way of actuating the rear brakes and will eventually loosen the holding power as the brake shoes wear. Adjustment needs to be made once the handle reaches the end of its travel, and the proper brake tension is not set, or this tension is not reached in the desired amount of handle travel. There is no other parking mechanism on the vehicle that holds it in place when parked so it is important to adjust it as soon as it is needed.
How to check and adjust the parking brake:
First: check to see if the tension is reached in your desired amount of travel. When the vehicle is adjusted at the factory, it is set so that when the park brake is pulled and reaches 5 clicks, the vehicle is not able to move when pushed or pulled. If the vehicle can move, adjustment needs to happen.
The adjustment for the park brake can be found under the vehicle at the gold-colored equalizer junction point.
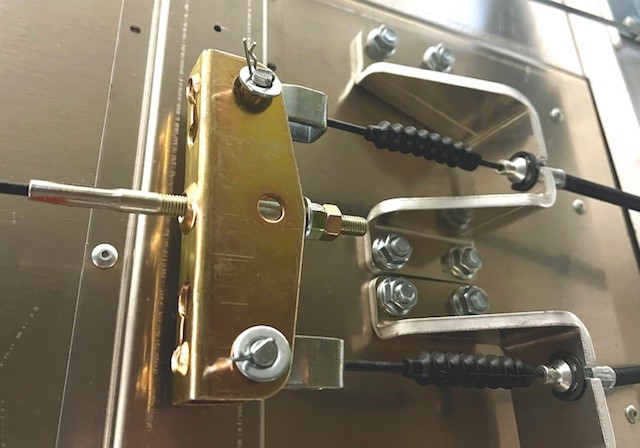
Next Step: locate the two hex nuts that are on the adjustment threads at the end of the brake cable.
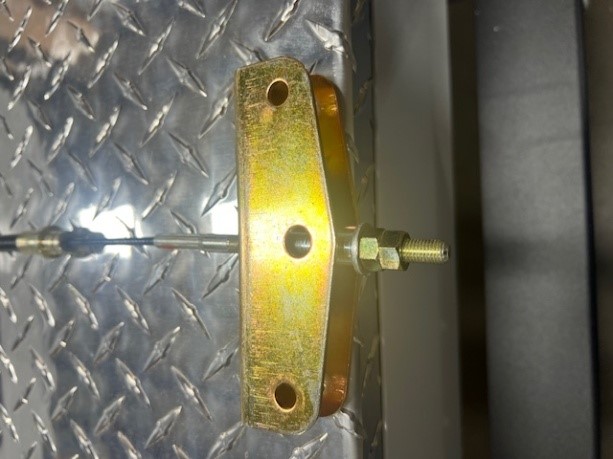
Next Step: Using a ½” wrench, loosen up the jam nut by backing it off.
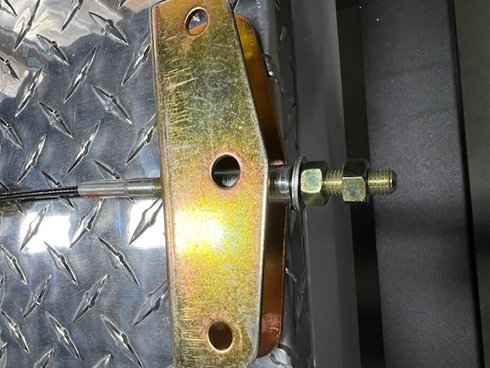
Next Step: Tighten the inside adjuster nut. A place to start would be by going roughly two full revolutions at a time and then going back into the vehicle and checking the tension on the handle. Continue this process until you find your desired tension and position.
Next Step: Once you are happy with the tension and lever position, tighten the jam nut once again to hold it in place. Before moving on, set the brake and release it a few times just to make sure everything is working and is able to release. Once you release the brake (push the lever back down), you should be able to move the vehicle by hand again. If the vehicle still will not move and the brakes are still engaged, you have gone too far. Go back under and back off the adjustment a little at a time until the brake releases.
If parking brake still does not seem to work correctly or hold on a hill the parking brake shoes have what is referred to as a star adjuster. The star adjuster helps the parking shoes mate with the drum completely. To access the star adjuster, you will need to remove the black plastic plugs at the rear of the parking brake backing plates. As seen in the image below.
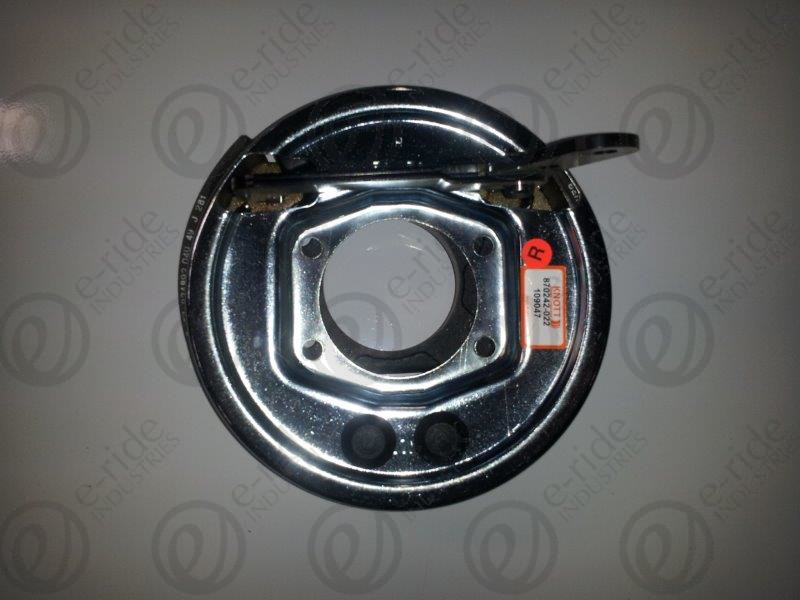
Both drivers and passengers side need to be adjusted. Remove the rear plastic plug on each side. On the right side rotate the star adjuster downward to tighten and upward to loosen. On the drives side rotate the star adjuster downward to loosen and upward to tighten. Rotate wheel while making the adjustment. Adjust until the wheel gets hard to turn then loosen the adjuster until wheel is free to turn and adjustment is complete.